2.7.17 – Presentation, Evaluation & Further Thoughts

I showed the class the completed images today, always a slightly nerve wracking experience. Luckily the reaction was positive. We decided that I would submit/ display 4 vertical images & the 2 long horizontal. I think that they work well together. Zig also suggested framing the original rather than displaying the photographs. Now I have to find frames.

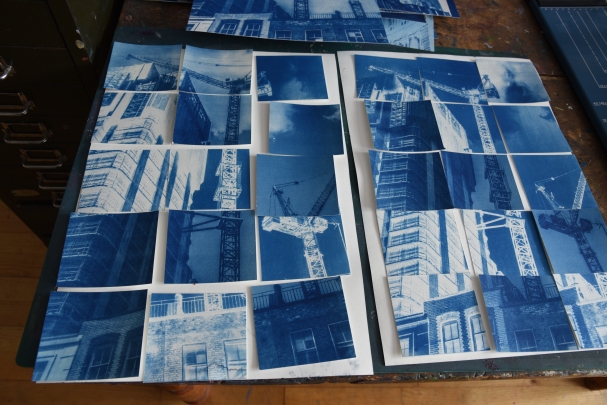
Zig also told me how to take photographs of final pieces of work. Rather than taking photographs of the images with them on the floor with a prime lens to mount them on the wall & use a zoom lens.

Which I have done. There is a certain amount of distortion but better than before.


2017-07-02 08.53.03

During the project I feel that I have gained a lot from using a combination of my research on urban landscape photographers,  alternative processes & Hockney’s multiple images to take me further than I would otherwise have gone. (5)

DH-6

MR-2

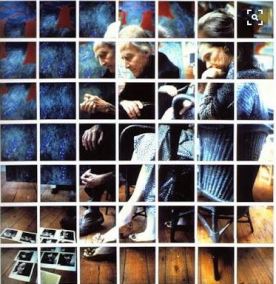
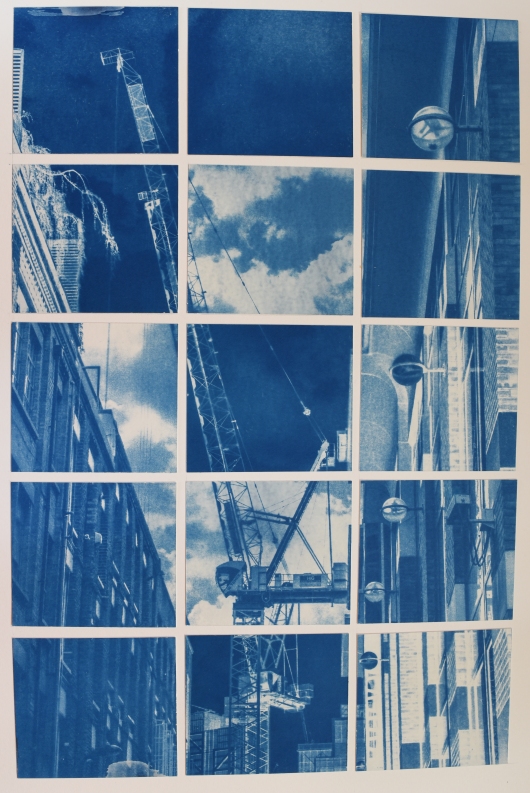
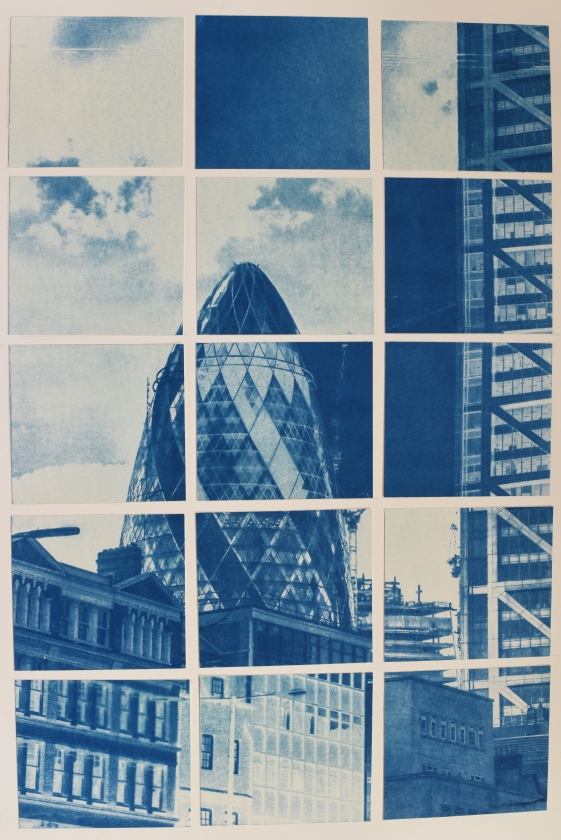
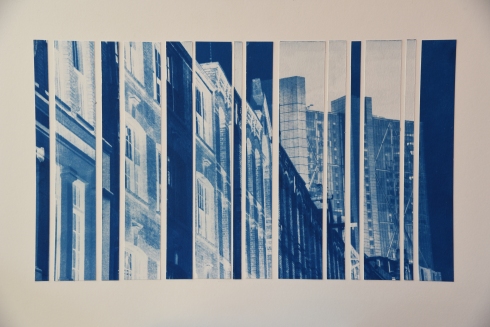
I feel that the two images which consist of vertical strips work well as they almost give the feeling of walking along the street & taking in what you pass by in fragments. The other 4 images are more static but  provide a fragmented image which the viewer has to piece together. Instead of the 4 being the same format it might have been more interesting if I had used a different arrangement for 2 of the images but this is something to experiment with in the future.

In retrospect I would have taken more images which would have given me more to choose from but  perhaps more importantly in my future work I will have a better idea of which images would work well as cyanotypes & how to process the original images to get the best out of them. I have also learnt more about the process of producing the actual cyanotypes.

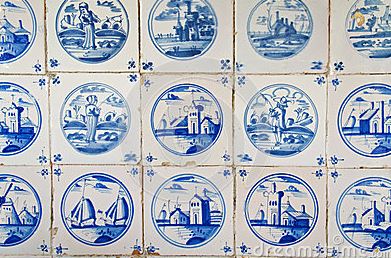
While I was working on my cyanotypes I was reminded of dutch ceramic tiles & views through windows particularly  those by artists such as Raoul Duffy & Pierre Bonnard as well as one by Chagall. I was interested in how we see images as fragments but reassemble them in our mind to make them whole. I would like to continue along this theme experimenting with the repetition & fragmentation of images. As well as taking them a step further and investigating the possibilities provided by giving them a sculptural dimension. (5)

B & W 01

I would also like to pursue one of my earlier thoughts,  reflections in water & glass. Perhaps combining images together that would not normally be connected.

After a certain amount of hunting on the web for suitable frames for my images I decided that Ikea was the best option for both price & speed.  I wasn’t intending to go for white frames but these were the only “box” frames available in that size. In the end I was pleased with the white option as the frame did not distract from the image. I then had to do some card cutting on which I mounted the images. In all it was quite successful if not a bit on the large side.


28.6.17 – Final Images

After a lot of cutting & gluing these are the final results. I used a tripod & a 50mm prime lens but unfortunately there was still some distortion. I’ll have to ask Zig if there is a better way of taking the images as I would prefer to exhibit them at the end of year exhibition than the actual pieces.

2017-06-26 16.20.22


2017-06-26 16.21.21

These two images show the images change when when the opposite tiles are used.

2017-06-26 16.24.14


2017-06-26 16.28.59


2017-06-26 16.27.57


2017-06-26 16.41.25


2017-06-26 16.39.16


20.6.17 – Flash – Aide Memoir

Another 3 sessions about how to use off camera flash – one day it will click.

General Information

In order to get the correct setting when using the off camera flash:

  1. Take a photograph without the flash in order to find out the ISO, Shutter Speed & Aperture required.
  2. With the flash on a stand place flash directed at subject – the distance away from the subject is trial & error.
  3. Open the on camera flash.

The flash becomes an additional sun & is particularly useful on sunny days when the sun produces hard shadows or when the subject is standing against the sun and without the flash would appear as a silhouette.

  • TTL – Through the Lens metering
  • EV – Exposure Value

The Shutter Speed can be used to either darken or lighten the background. The faster the Shutter Speed the darker the background.

Flash Bracketing

On the Menu there is a sub programme Flash Bracketing – through this the power of the flash can be altered.

The zoom alters the spread of the light given by the flash.

To set the flash when it is not on the camera go to Bracketing Flash & Flash Control for built in flash  – set to CMD – commander mode

  • Using the built in flash limits the Shutter speed to 250.
  • Either with the Speedlight on the camera or off the camera together with a trigger & receiver the shutter speed can be increased to 800.
  • The strength of the flash can be altered on the trigger.

Using colour overlays on the flash can help to correct the colour of the image, which would  otherwise be effected  by the bright light of the flash.

  • Blue – snow
  • Green – fluorescent
  • Yellow – indoor light bulbs & candle light

Channels & Groups

If different photographers wish to work in the same area the  flash lights can be set to different channels so that not all of the flashes go off at the same time. The camera can be set using e3 Flash control for built in flash.

If there is a need to work with multiple flashes they can be put into separate groups, with each group  set as required.

Now all I need to do is practise.

23.6.17 – Cyanotypes – Fun & Games

After my frustrations with my cyanotypes I found this : http://www.mikeware.co.uk/mikeware/New_Cyanotype_Process.html

Which describes the problems that can arise with cyanotypes – one of them being that the paper may not absorb the sensitizer, this was confirmed by Zig. If only I had a)known this before b) emailed Zig to ask him.  A definite learning process.

A few days later I had amassed the cyanotypes that I wanted, now I had to decide how to present them. In a previous blog I had shown the positive & negative images cut up into tiles & then reassembled – I liked the result as it gave the image more depth similar to Hockney’s photo collages & joiners. With the majority of the images I cut up the cyanotypes into rectangles as accurately as possible, drew grids on card as accurately as possible –  luckily I have a drawing board which made things easier. Then the fun began…… Trying to decide what went where was like a glorified combination of Snap and Pictionary. (2)


2017-06-23 14.42.42

With 2 of the images I thought that they would work better as vertical strips which would give the feeling of walking along the road.

2017-06-30 11.56.11